A Step-by-Step Guide – How to Start a Blog on Blogger.com
Whether you are a creative writer, a business owner, or simply someone who wants to share ideas with the world, Blogger.com offers one of the easiest and most accessible platforms to get started – completely free. Powered by Google, Blogger has been helping beginners launch their first blogs for decades. This guide will walk you through the entire process from signing in to publishing your very first post.
What Is Blogger.com and Why Use It?
Blogger.com is a free blogging platform owned by Google, making it incredibly easy to set up if you already have a Google account. It offers free hosting under a .blogspot.com subdomain, a simple dashboard, customizable themes, and built-in Google integrations like AdSense for monetization. It is the perfect starting point for anyone new to blogging who does not want to invest money upfront.
Step 1 – Go to Blogger.com and Sign In

Open your browser and navigate to www.blogger.com. You will be greeted by a large orange “Create Your Blog” button in the center of the page. Click it, and you will be prompted to sign in with your existing Google account. If you do not have one, you can create a free Google account in minutes be
Whether you are a creative writer, a business owner, or simply someone who wants to share ideas with the world, Blogger.com offers one of the easiest and most accessible platforms to get started – completely free. Powered by Google, Blogger has been helping beginners launch their first blogs for decades. This guide will walk you through the entire process from signing in to publishing your very first post.
Step 2 – Click “Create New Blog”
After logging in, you will land on the Blogger Dashboard. On the left side of the screen, click the down arrow icon and then select “New blog”. If this is your very first time using Blogger, the platform will automatically open the “Create a New Blog” setup window for you without any extra clicks.
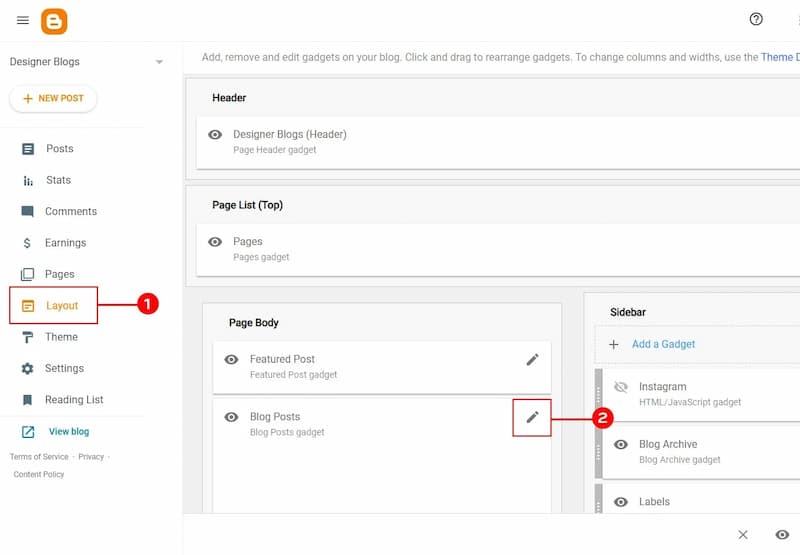
The dashboard is your central hub for everything – from writing posts to managing settings and tracking statistics. Take a moment to familiarize yourself with the sidebar menu, which includes Posts, Pages, Stats, Comments, Earnings, Layout, Theme, and Settings.
Step 3 – Name Your Blog
In the setup window, you will see a Title field. Type in the name you want for your blog here. This could be something personal like “Maria’s Travel Diaries” or something niche-focused like “The Urban Gardener.” Your title will appear at the top of your blog and in browser tabs, so make it memorable and relevant to your content.
Click Next once you have entered your title. You can always change your blog’s name later through the Settings menu, so do not stress too much at this stage.
Step 4 – Choose Your Blog Address (URL)
This is your blog’s unique web address – for example, yourblogname.blogspot.com. As you type in the Address field, Blogger will automatically check availability in real time. A blue checkmark icon next to the field means the address is available, while a yellow warning icon means it is already taken and you need to try a different one.
Keep your URL short, simple, and easy to remember. Avoid using numbers or special characters if possible, as clean URLs are easier to share and better for search engine optimization. Once you find an available address, click Save.
Step 5 – Select a Theme
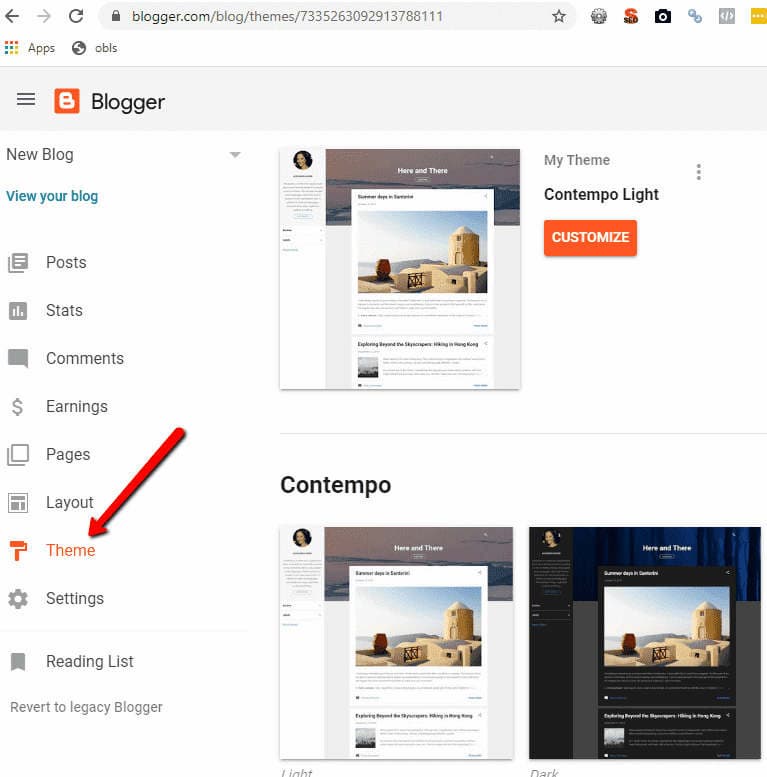
Before your blog goes live, Blogger will ask you to choose a starter theme (also called a template). These are pre-designed visual layouts that control how your blog looks to visitors. You will see a grid of options like Contempo, Soho, Emporio, and Notable – simply click on one to select it.
Do not worry too much about making the perfect choice right now – you can fully customize and change your theme at any time from the Theme section of your dashboard. Once you have selected a theme, click Create Blog to finalize your new blog.
Step 6 – Explore Your Dashboard
Congratulations – your blog now exists! You will be taken to your personal Blogger Dashboard, which is your control center for everything. The left sidebar gives you access to all major sections. Here is a quick overview of the key areas:
-
Posts – where you write, edit, and manage all blog articles
-
Pages – for static content like “About Me” or “Contact”
-
Layout – drag-and-drop tool to arrange your blog’s sections and gadgets
-
Theme – customize colors, fonts, and your blog’s overall design
-
Settings – configure your blog name, description, privacy, and more
-
Stats – track page views and audience data
Step 7 – Write Your First Blog Post
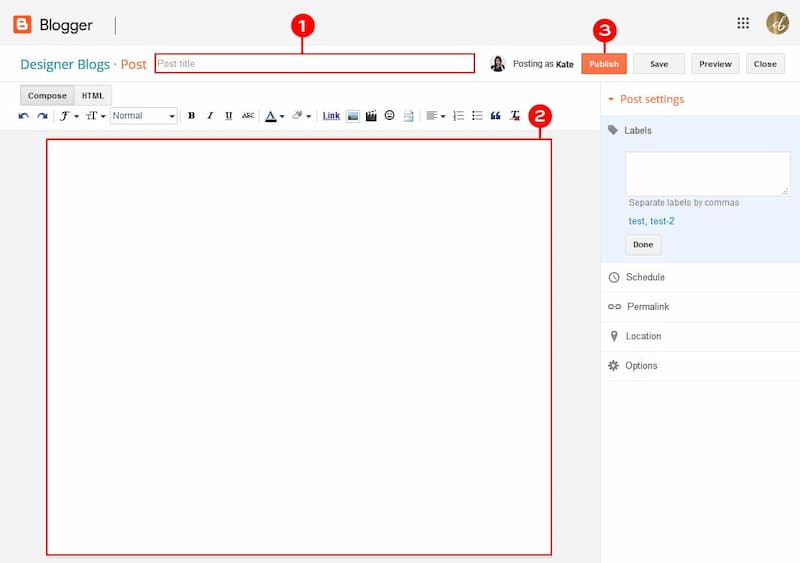
To create your first post, click the pencil icon (or the orange “New Post” button) from the dashboard. This opens the Post Editor, which has two main views: Compose (a visual editor similar to Word) and HTML (for those who prefer to code directly).
Start by typing a compelling title in the title field at the top. Then write your content in the large text area below. The toolbar at the top of the editor lets you format text (bold, italic, underline), change fonts and colors, add bullet lists, and insert links.
Step 8 – Add Images to Your Post
A blog post with images is far more engaging than plain text. To add an image, click the Insert Image icon in the post editor toolbar. A dialog box will appear offering several upload options:
-
Upload from your computer
-
Use images from your Google Photos account
-
Enter an image URL from the web
-
Search from Google Drive
Select your image and click Insert. Once the image appears in your post, you can click on it to adjust its size, alignment, and caption directly within the editor.
Step 9 – Add Labels (Categories)
Before publishing, it is good practice to add labels to your post – these act as categories to help readers find related content. On the right side of the post editor, look for the Labels field. Type in a relevant keyword such as “Travel,” “Food,” or “Technology” and press Enter.
Labels also improve your blog’s navigation and SEO, making it easier for search engines to index and rank your content. You can add multiple labels to a single post, separated by commas.
Step 10 – Preview and Publish Your Post
Before making your post live, always click the Preview button to see exactly how your post will appear to readers. Check for any formatting issues, spelling errors, or image alignment problems at this stage.
When everything looks great, click the Publish button. Your post is now live on the internet at your blogspot address! You can share the link on social media, email it to friends, or add it to your email signature to start building an audience.
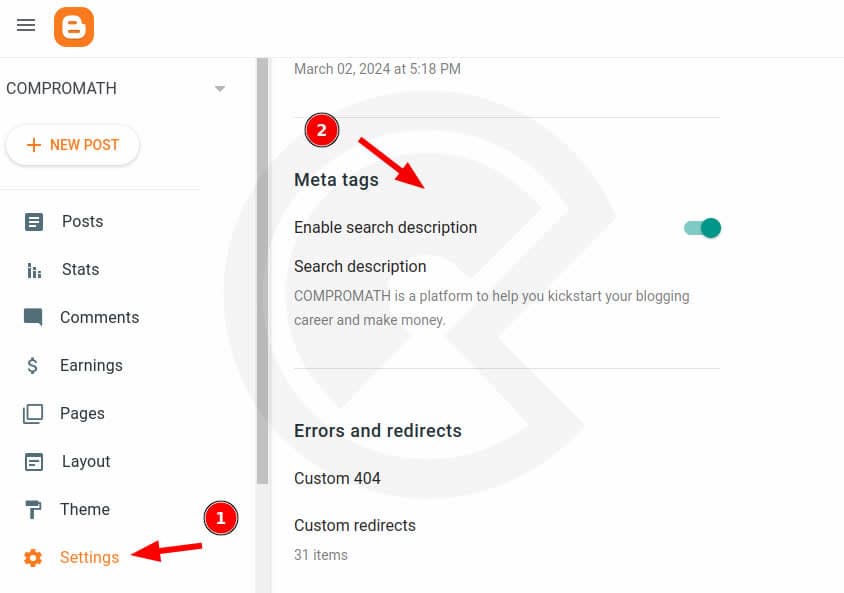
Step 11 – Customize Your Blog Settings
With your first post published, take some time to fine-tune your blog through the Settings menu. Key settings to configure include:
-
Blog description – a short tagline that summarizes what your blog is about
-
Privacy settings – choose whether your blog is visible to search engines
-
Comment moderation – decide who can comment and whether you must approve comments first
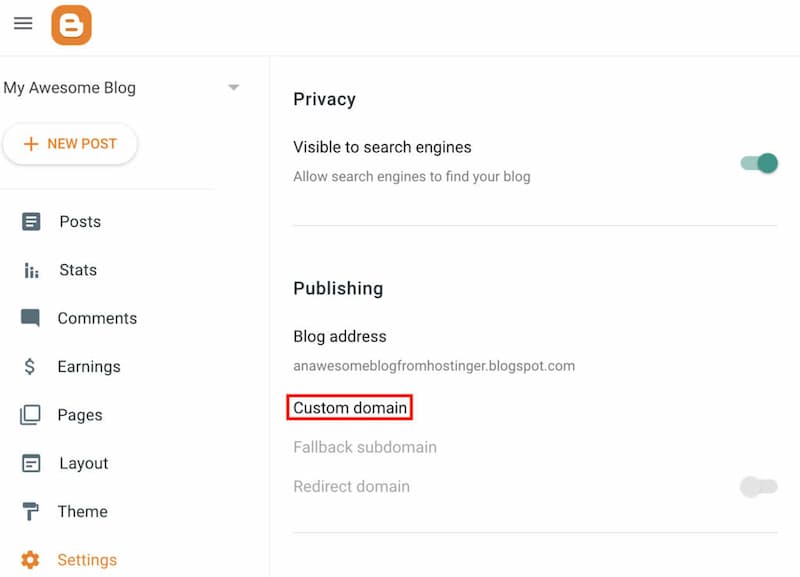
-
Custom domain – if you want a professional address like
www.yourblog.cominstead of.blogspot.com
Blogger divides settings into clear categories – Basic, Posts and Comments, Language and Formatting, Search Preferences, and Other – making it straightforward to find exactly what you need.
Pro Tips for a Successful Blogger Blog
Now that your blog is up and running, keep these best practices in mind:
-
Post consistently – regular publishing keeps readers coming back and helps with SEO rankings
-
Use descriptive post titles – clear, keyword-rich titles attract more traffic from search engines
-
Optimize images – always add alt text to images for both accessibility and SEO
-
Engage with readers – respond to comments to build a loyal community
-
Monetize your blog – Blogger integrates directly with Google AdSense, allowing you to earn money from ads once your traffic grows
-
Back up your content – use Blogger’s export feature under Settings to regularly save a copy of your entire blog
Blogger.com is a fantastic launchpad that costs nothing and requires no technical knowledge whatsoever. By following the steps above, you can go from having no blog at all to having a fully functional, publicly accessible blog in under 30 minutes. Start writing, stay consistent, and watch your audience grow!